Flags! But in your Terminal with Shaders.
Getting Started
Enabling Shaders in Your Terminal
There is currently an experimental feature in the Windows Terminal that allows you to assign a HLSL shader to your terminal to customize its appearance. I’ve been exploring this a bit and wanted to share a quick flag example that you can use or modify with the terminal.
To use this feature you’ll need to point your Terminal’s settings towards the HLSL shader you’d like to use.
| |
Then enable Shader’s in your terminal. This can be done by either
pressing ctrl + shift + p and “Toggle terminal visual effects”. Or you can edit your Terminals keybindings with a Toggle Shader Effects hotkey to make this easier:
| |
The Basic’s of a Terminal Shader
Now we can start to build the shader!
A simple no-op shader that will re-render the screen might look like this:
Texture2D shaderTexture;
SamplerState samplerState;

cbuffer PixelShaderSettings {
    float  Time;
    float  Scale;
    float2 Resolution;
    float4 Background;
};

float4 main(float4 pos : SV_POSITION, float2 tex : TEXCOORD) : SV_TARGET
{
    return shaderTexture.Sample(samplerState, tex);
}
This includes inputs from the Terminal (shaderTexture etc) and a main function. The results of your main function is the Red, Green, Blue and Alpha that will be rendered.
Note: This will be rendered on top of your Terminals background if you have
one enabled. Your Terminal background will not render if your shader returns
an opaque (alpha = 1) color.
Core Shader Functions - Building the Gradient
What we’re trying to do is render a flag from multiple horizontal bars. To approach that we’ll use what I’m calling a “stepped” gradient. A transition between a set of colors with hard edges between each color. This can be built using a set of lerp and step functions in your shader.
Using lerp and step
lerp accepts three values. A left hand side and right hand side value and then a transition value between 0 and 1. Lerp will linearly interpolate between the two values based on the transition value.
step takes two values. It will return 1 if the second argument is greater than the first argument. Otherwise it will return 0. By using this as the transition value in our lerp function we can move between a set of options.
For example in this WebGL shader on shadertoy we can move between red, green and blue over the screen by dividing the screen into sections and using the vertical height as our transition value.
float4 gradient(float pos)
{
    float step1 = 0.333;
    float step2 = 0.667;

    float3 result = float3(1, 0, 0); //Step0 between 0 and step1
    // Step through each case and choose either the previous result or the new result:
    result = mix(result, float3(0, 1, 0), step(step1, pos));
    result = mix(result, float3(0, 0, 1), step(step2, pos));
    return float4(result, 1);
}
Shader Inputs
Now that we have the function for creating a gradient lets explore the inputs we can use to create this effect. There are a few inputs provided to your shader code from the terminal:
Texture2D shaderTexture;
SamplerState samplerState;

cbuffer PixelShaderSettings {
    float  Time;
    float  Scale;
    float2 Resolution;
    float4 Background;
};
The important ones for us are the shaderTexture and samplerState which includes information about the text rendered to the screen. Without this input we would not render any text to the screen. You can see what happens by replacing the main method with return float4(0,0,0,1);. Your terminal will render as a black screen!
We will also take advantage of Time and Resolution as well. The Time parameter will allow us to inject an animated waving effect into our flag and the Resolution can be used to handle changing Terminal window sizes.
The Flag Waving Animation
To create the waving animation on the flag we’ll apply a set of sin waves that modulate the screen height we pass into our gradient color function. By using multiple passes of sin waves we can use fourier transforms to create more complex patterns than just moving up and down. This can help us achieve the “moving in the wind” effect we’re trying to create.
I’ve parameterized the frequency (PERIOD#TIME) and phase (PERIOD#POSITION) and also provided a scalar value (PERIOD#STRENGTH) that can effect the two waves used in the effect. Depending on what you would like to accomplish modifying or adding to these formula can dramatically change the effect.
Note: Right now this shader is not written to ignore aspect ratios. This means that your waves will stretch or compress as you change the size and ratio of your terminal window.
The Terminal Shader
Putting these concepts together we can build our flag. While there is a lot of code here a lot of it is doing the same or similar things.
If your unsure what something is doing I’ve included a number of
#definelines.
These control a number of things with the shader and you can change them to alter the
behavior. If you mess something up you can always come back and grab the original source
again!
This is the shader code:
// Flag Shader for Windows Terminal
// By: Sam Wronski - worldofzero.com
// A quick stepped gradient example that can be used in the Windows Terminal
// To enable shaders in Windows Terminal (an experimental feature currently):
// "profiles": {
//   "defaults": {
//     "experimental.pixelShaderPath": "The Path to Your Shader"
//   },
// }

// Terminal Inputs:
Texture2D shaderTexture;
SamplerState samplerState;

cbuffer PixelShaderSettings {
    float  Time;
    float  Scale;
    float2 Resolution;
    float4 Background;
};

// Settings
// Customize Colors (1 = TOP of screen, 12 is bottom)
// to create a different flag
#define COLOR1 float4(0.95,0,0,1)
#define COLOR2 float4(0.95,0,0,1)
#define COLOR3 float4(1,141.0/255,0,1)
#define COLOR4 float4(1,141.0/255,0,1)
#define COLOR5 float4(1,0.95,0,1)
#define COLOR6 float4(1,0.95,0,1)
#define COLOR7 float4(0,129.0/255,33.0/255,1)
#define COLOR8 float4(0,129.0/255,33.0/255,1)
#define COLOR9 float4(0,76.0/255,1,1)
#define COLOR10 float4(0,76.0/255,1,1)
#define COLOR11 float4(118.0/255, 1.0/255, 136.0/255, 1)
#define COLOR12 float4(118.0/255, 1.0/255, 136.0/255, 1)
// Flag Strength is the opacity of the flag (1.0 is completely opaque)
#define FLAGSTRENGTH 0.2
// Control the sin wave length and strength of the flag wave
#define PERIOD1POSITION 10
#define PERIOD2POSITION 0.5
#define PERIOD1STRENGTH 0.05
#define PERIOD2STRENGTH 0.2
#define PERIOD1TIME 1.1
#define PERIOD2TIME 1

float4 flagColor(float position) {
    float step1 = 0;
    float step2 = 0.08333;
    float step3 = 0.1667;
    float step4 = 0.25;
    float step5 = 0.3333;
    float step6 = 0.4167;
    float step7 = 0.5;
    float step8 = 0.5833;
    float step9 = 0.6667;
    float step10 = 0.75;
    float step11 = 0.8333;
    float step12 = 0.9167;

    float4 result = COLOR1;
    result = lerp(result, COLOR2, step(step2, position));
    result = lerp(result, COLOR3, step(step3, position));
    result = lerp(result, COLOR4, step(step4, position));
    result = lerp(result, COLOR5, step(step5, position));
    result = lerp(result, COLOR6, step(step6, position));
    result = lerp(result, COLOR7, step(step7, position));
    result = lerp(result, COLOR8, step(step8, position));
    result = lerp(result, COLOR9, step(step9, position));
    result = lerp(result, COLOR10, step(step10, position));
    result = lerp(result, COLOR11, step(step11, position));
    result = lerp(result, COLOR12, step(step12, position));

    return result;
}

float4 main(float4 pos : SV_POSITION, float2 tex : TEXCOORD) : SV_TARGET
{
    float height = pos.y;
    height += sin(Time * PERIOD1TIME + pos.x / Resolution.x * PERIOD1POSITION ) / PERIOD1STRENGTH;
    height += sin(Time * PERIOD2TIME + pos.x / Resolution.x * PERIOD2POSITION ) / PERIOD2STRENGTH;
    return flagColor(height / Resolution.y) * FLAGSTRENGTH + shaderTexture.Sample(samplerState, tex);
}
Alternative Color Schemes
The colors in the shader may be configured by replacing the definitions. If you’d like to change the flag into a Trans Pride flag for example you could use these definitions. The shader supports 12 different segments.
#define COLOR1 float4(0.33,0.8,0.95,1.0)
#define COLOR2 float4(0.33,0.8,0.95,1.0)
#define COLOR3 float4(0.33,0.8,0.95,1.0)
#define COLOR4 float4(0.97,0.6,0.675,1.0)
#define COLOR5 float4(0.97,0.6,0.675,1.0)
#define COLOR6 float4(1.0,1.0,1.0,1.0)
#define COLOR7 float4(1.0,1.0,1.0,1.0)
#define COLOR8 float4(0.97,0.6,0.675,1.0)
#define COLOR9 float4(0.97,0.6,0.675,1.0)
#define COLOR10 float4(0.33,0.8,0.95,1.0)
#define COLOR11 float4(0.33,0.8,0.95,1.0)
#define COLOR12 float4(0.33,0.8,0.95,1.0)
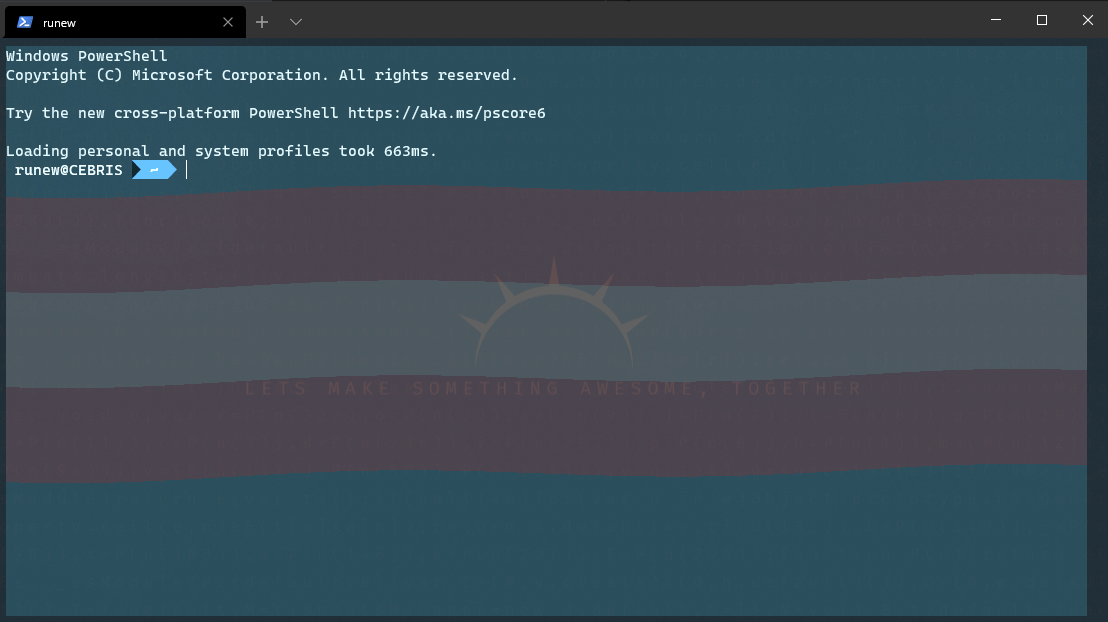
In Terminal Example
Here’s an example of what using this might look like in a terminal:
Notes on Debugging
Right now if your shader does not work you will see an error message:
Warning: Unable to compile the specified pixel shader.
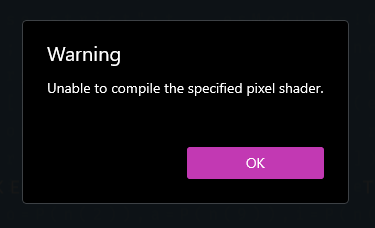
If you see this double check your shader code to ensure that you haven’t missed a semicolon or other symbol. If you are copying your code from somewhere make sure to confirm that the shader your using is for the correct platform.
These shaders are written for DirectX in HLSL (High Level Shader Language). If you’re pulling code from ShaderToy or another OpenGL based shader then your going to need to convert the shader before you can use it here.
You can learn more about using Pixel Shaders in the Terminal here.