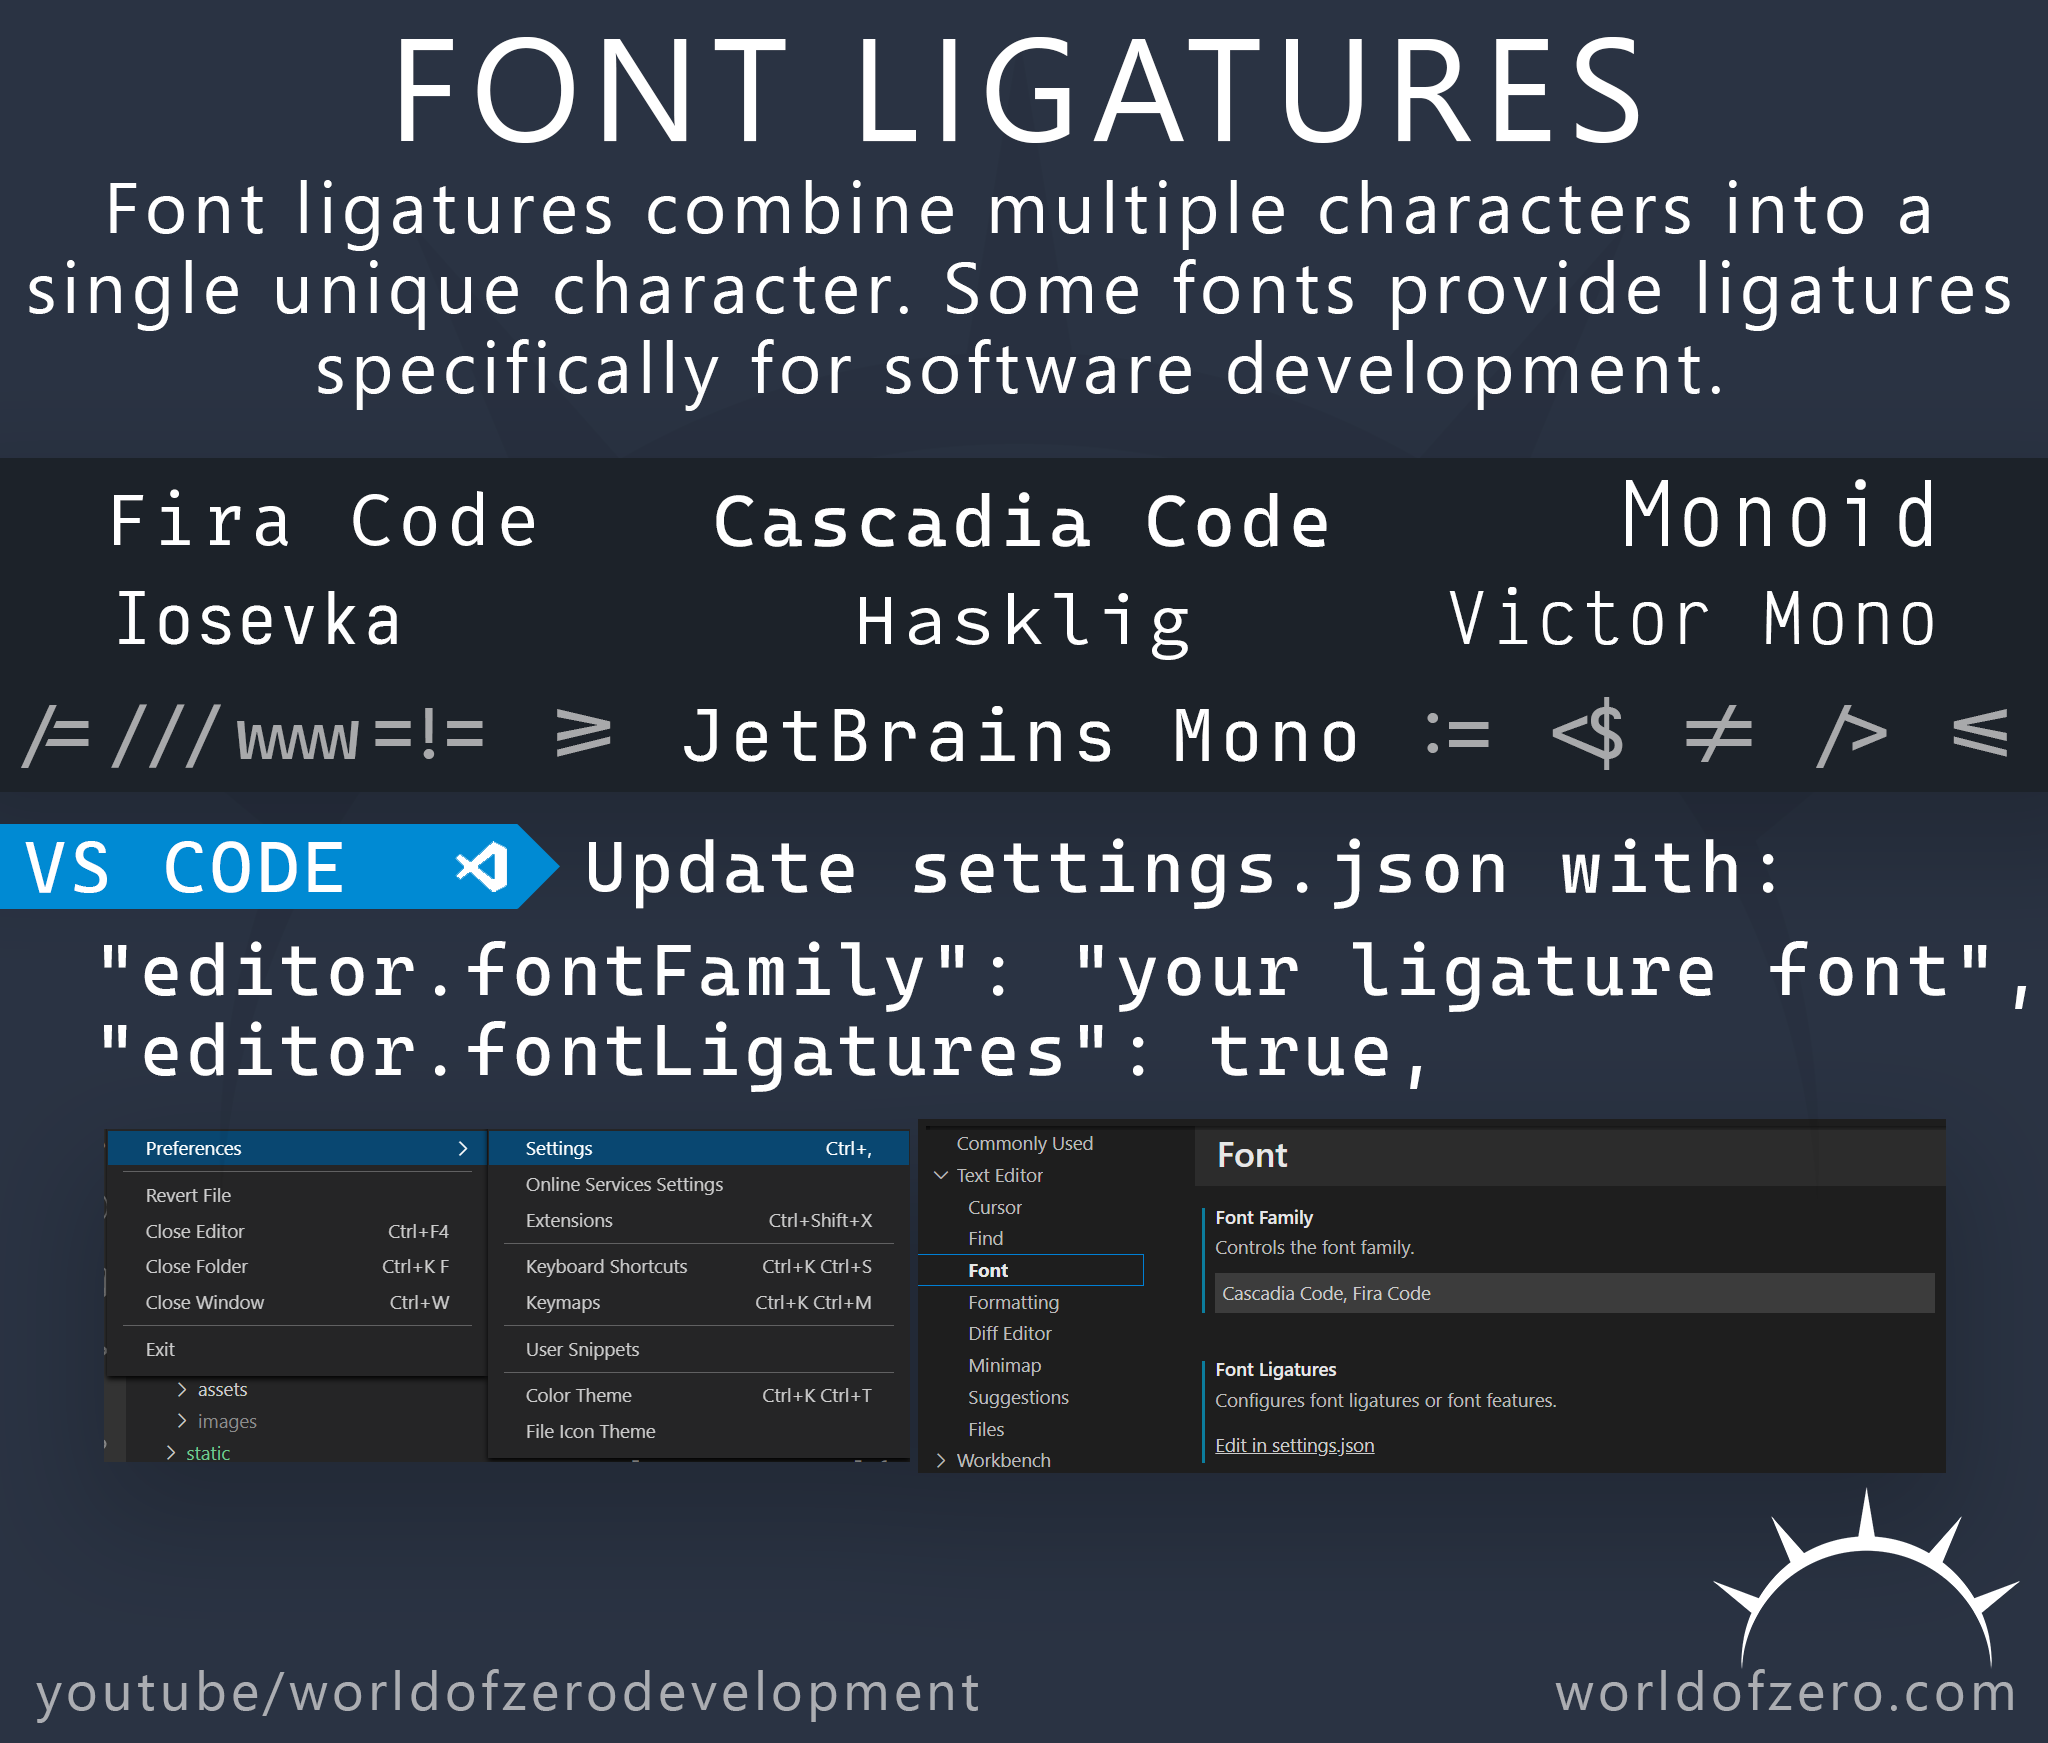
Font ligatures combine multiple characters into a single unique character. Some fonts provide ligatures specifically for software development.
Some free fonts that support ligatures are:
| Font | Reference |
|---|---|
| Cascadia Code | link |
| Fira Code | link |
| JetBrains Mono | link |
| Iosevka | link |
| Hasklig | link |
| Monoid | link |
| Victor Mono | link |
To enable font ligatures in Visual Studio Code you will need to edit the settings.json file. To do this open the VS Code settings (File -> Preferences -> Settings) select the Text Editor group and Font settings. Replace the name of the font with the font you would like to use. For example if you would like to use Cascadia Code then replace the font with Cascadia Code. You may include fallback fonts that will be used if the first font is not available. Cascadia Code, Fira Code will prioritize Cascadia Code but use Fira Code if Cascadia Code isn’t available on the current machine.
Once you’ve configured the font you’ll need to explicitly enable ligatures. This is a separate option and requires you to modify the settings.json file directly. You will need to add the "editor.fontLigatures" setting to your settings.json settings file. Once this is done your settings should include two lines that look something like this:
| |
Once you’ve made these changes you should be ready to start taking advantage of ligatures in your code.
Different fonts may support a different set of ligatures.
If you still need help, here is a video walking through the process of configuring ligatures in VS Code.